|
A Digital Demo--Page Seven: Layer Masks, Rulers and Guides, Edit/Transform Kalamazoo College Richard Koenig Office Location: Light Fine Arts 203, Phone: 337.7003 To digital page To my homepage |
|
Layer Masks Below, please find three uses of the layer mask. This tool has many uses, but we'll just explore a couple of things here quickly... 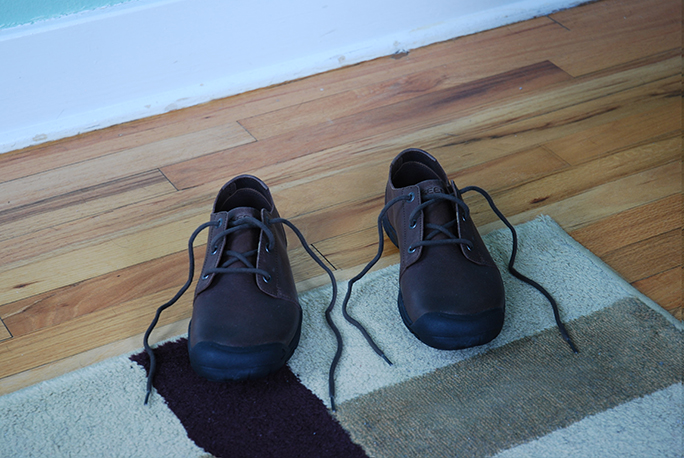
Doppelganger--Two Left Feet The creation of twins is easily done if one works with a tripod combined with manual settings (like I do when I shoot multi-image panoramas). If you work methodically while shooting, it's easy to then combine into a single image. First, simply stack the two photographs as layers. (You may have to first rasterize the layer to do what I'm going to do here.) Next, use a layer mask to see through a portion of the top layer (to let a portion of the lower layer shows through). Layer masks, when combined with the gradient tool, are also very useful when you want to fade from one picture to another: see the following two examples now... With the first example, I intend to suggest that the legs of the fellow pictured transition into the water. In the second, the same picture is flipped horizontally and laid on top of itself (inverted as well). We then use the layer mask and the gradient tool to transition from one layer to another equally across the entire image. Below these layer mask examples, you will find two different uses of rulers and guides. These are simple tools, but ones that I cannot live without (okay, a slight exaggeration). 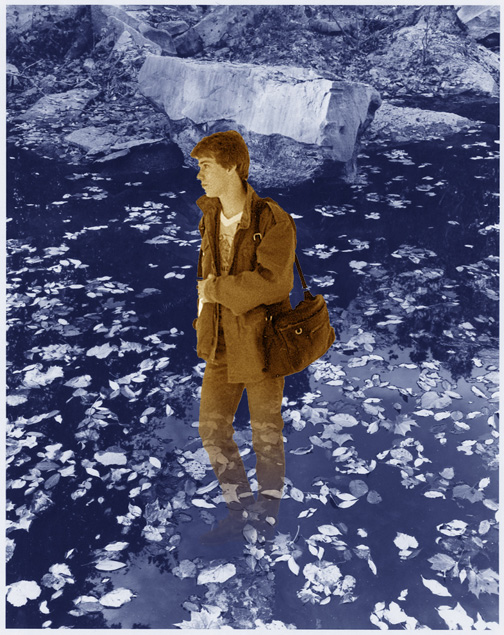
work on kelly first...use the magic wand to slect the man
to add the isolated part of the background to the selection, hold down the shift key and click in that area a second time remember, in cases like this (plain background) we first select the background, then go up to menu bar => select => inverse to get the "non-background"
click on the other image (quarry2) paste (command "v")
use the gradient tool to draw a line vertically from his bag to the bottom of this feet click the quick mask tool again hit delete command "d" will get rid of wanted "marching ants" done 
create a duplicate layer select top layer and do two things to it...
flip that layer horizontally
use edit => transform => flip horizontal (rather than image=>image rotation) make color-picker black and white choose the gradient tool in the toolbox click "edit in quickmask mode" at bottom of toolbox draw a line across the image from left to right click out of quickmask mode...you should see marching ants hit the delete button now the bottom layer should show through...feathered nicely Guides and Rulers
use the move tool and go into the ruler area itself click on that ruler area and drag the mouse into the picture area (try the top) a guide will appear drag it to the middle of the image--it should snap to the exact center do the same from the side ruler, drag the guide to the center again use the guides in conjunction with markings on the rulers to create grids or to square things up with this first example, the individual pictures of the triptych will "snap to" the cross-hairs created by the guides (one can also align things by their edges, rather than their center) 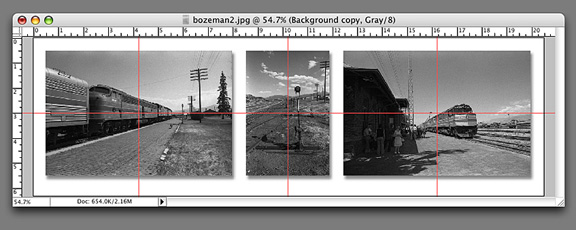 Please make a horizontal triptych similar to the one above. Square up a picture
 before 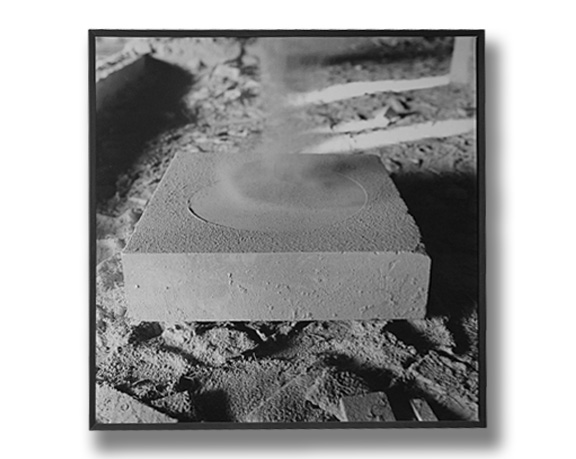 after
make a duplicate layer fill the bottom layer with white
click back up to the top layer and cut away the non-picture
or use the polygonal lasso tool right now to be quicker then go to menu bar, select, inverse this will select the non-picture/painting...delete next, drag four guides into the image arrange/place the guides using the measurements on the rulers to make a perfect square (in this case) distort the top layer (picture/painting) to match the guides...
force the picture/painting to conform to the perfect square created by the guides |
Next Page
Back to Index Page