|
A Digital Demo--Page Nine, More on Text Kalamazoo College Richard Koenig Office Location: Light Fine Arts 203, Phone: 337.7003 To digital page To my homepage |
|
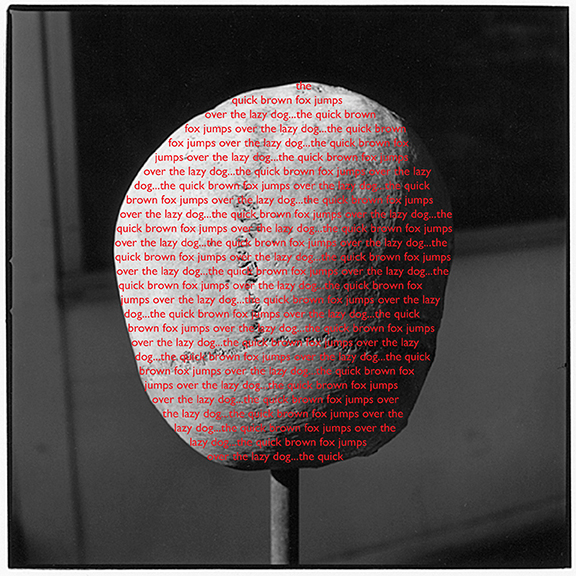
Text with Illustrator Text Inside a Shape  go here for a picture of the skull
import a background picture: menu bar, file, place menu bar, view, rulers, show rulers tool box, arrow, alter scale of image (can hold down shift to contrain proportions) if you've moved it about, place the picture in the center of the page and make it fairly large go to the pen tool (as we did in photoshop) and select the skull itself if you have trouble, just use the ellipse tool to make a selection the inside might fill with a color automatically as you make the selection add text
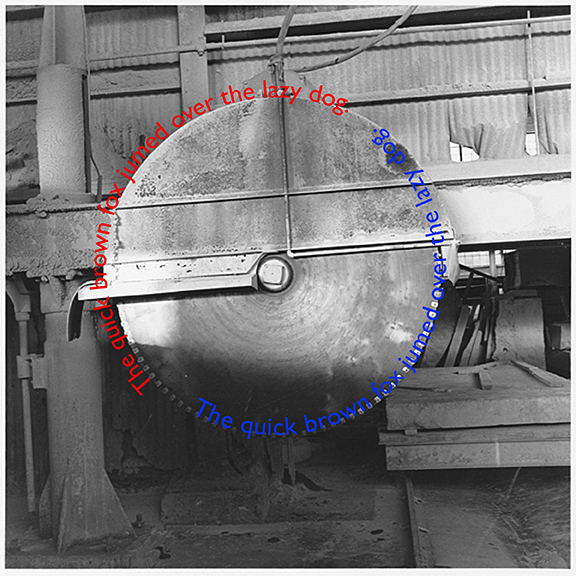
click the cursor ON the slection line put in lots of text until the space is full--make one phrase, copy and paste to suggest an obsessive skull use the regular type tool to highlight the text, change size and color you can go to options bar and click on "paragraph" to get a palette to come up where you can click to change the type size easily as you watch it grow use a color (look for color pick in options bar, to the right) that can be seen in both highlight and shadow save and name the file, use the Illustrator EPS format from that file, you may "export" as a tiff (for printing) or a jpeg (for use on the web) Text Along a Path  go here for a picture of the saw
import a background picture: menu bar, file, place tool box, arrow, place the picture in the center of the page this time use the ellipse tool and create a disk over the saw the inside should fill with the foreground color automatically as you create the disk use arrow tool to move the disk over the saw perfectly (move from center point of disk) add text
tool box, path type tool ("t" following a line) click the cursor ON the slection line at roughly 10 o'clock of the ellipse make one phrase, have it travel along the top of the circle use type tool to highlight the text, change size and color to move the text along the ellipse, look for a handle near the end of your text more type
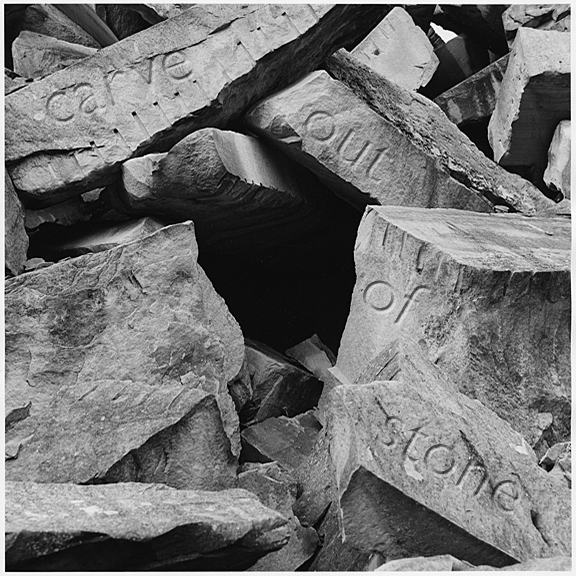
copy and paste use the handle to move this text to the opposite side of the circle you can also move it so that it shifts to the center of the circle if you like, as in my example play with size and color again so that it stands out as different than the first save and name the file, use the Illustrator EPS format from that file, you may "export" as a tiff (for printing) or a jpeg (for use on the web) More Photoshop Text Effects as Text  go here for a picture of the stones See if you can make it look like the text is carved out of the stone iteself. In this case, I would begin with text...which you can rotate this way and that (edit => tranform => rotate). It doesn't matter what color the text is: we're going to erase that anyway. Then add the effect (layer => layer style => bevel and emboss). Look carefully at all of the adjustments you can make there (such as the bevel going "in" or "out"). And now to erase the text itself, leaving only the effect... You're familiar with the opacity setting in the layers palette...in this case, go to the "fill" setting and put it at zero. You'll see the letter itself disappear, but the effect remain. (Opacity would affect both the cotent and the effect.) |
Next Page
Back to Index Page